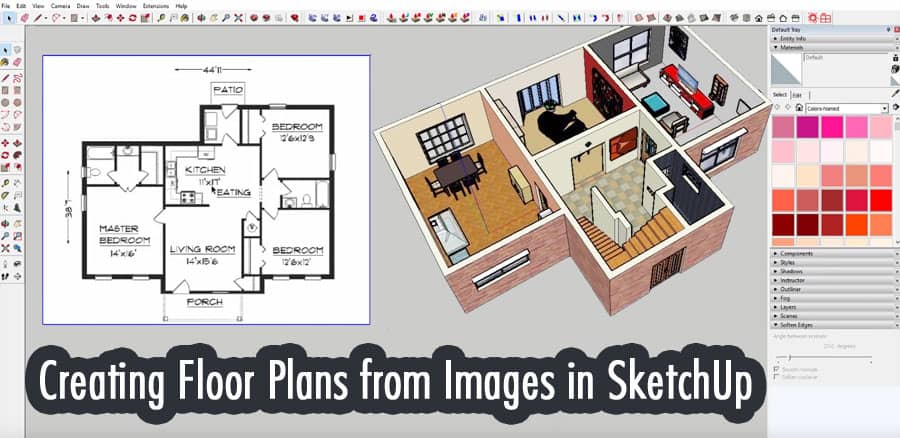
Floor plans are essential in the world of architecture and interior design. They allow architects and designers to visualize and communicate the layout of a building, its interior spaces, and how they are connected. SketchUp is a popular 3D modeling software that can be used to create accurate floor plans from images.
Introduction
SketchUp is a powerful tool that can be used to create 3D models, including floor plans. With SketchUp, you can create a detailed floor plan from an image, which can help you visualize and plan your design. In this article, we will take you through the process of creating floor plans from images in SketchUp.
Preparing the Image
Before importing an image into SketchUp, you need to ensure that it is of good quality and properly scaled. A high-quality image will ensure that you get accurate results when tracing the floor plan. You can use any image editing software to prepare the image. Ensure that the image is in a standard format such as JPG, PNG, or GIF.
Creating a New Project
To create a new project in SketchUp, open the software and select “File” from the menu bar, then select “New”. This will create a new project with default settings.
Importing the Image
To import the image into SketchUp, select “File” from the menu bar and select “Import”. Navigate to the location where you saved the image and select it. The image will be imported into SketchUp as a texture.
Scaling the Image
To scale the image, you need to use the tape measure tool. Select the tape measure tool from the toolbar and click on a known length in the image. This will set the scale of the image. You can then use the tape measure tool to measure distances in the image and ensure that they are accurately represented in SketchUp.
Tracing the Floor Plan
To trace the floor plan, select the line tool from the toolbar and trace the walls and other features in the image. Ensure that you trace the walls accurately and that the lines are connected.
Creating Walls
Once you have traced the floor plan, you can use the line tool to create walls. Select the line tool and draw a line along the traced walls. When you connect the lines, SketchUp will automatically create a face, which represents the wall.
Adding Doors and Windows
To add doors and windows, select the rectangle tool from the toolbar and draw a rectangle where you want the door or window to be. You can then use the push/pull tool to push the rectangle into the wall to create the opening.
Creating Rooms
To create rooms, you need to use the rectangle tool to draw a rectangle that represents the room. You can then use the push/pull tool to create walls and the line tool to create openings for doors and windows.
Adding Furniture and Fixtures
To add furniture and fixtures, you can use the 3D Warehouse. The 3D Warehouse is an online database of 3D models that can be imported into SketchUp. Once you have found the model you want to use, simply click on the download button to add it to your SketchUp project. You can then position the furniture or fixture within your floor plan.
Adding Textures
To make your floor plan more realistic, you can add textures to your walls and other surfaces. SketchUp comes with a library of textures that you can use, or you can import your own. To add a texture, select the face you want to apply it to and click on the paint bucket tool. Select the texture you want to use and click on the face.
Exporting the Floor Plan
Once you have completed your floor plan, you can export it as a 2D image or a 3D model. To export as a 2D image, select “File” from the menu bar and select “Export”. Choose the format you want to export in and save the image. To export as a 3D model, select “File” and select “Export 3D Model”. Choose the format you want to export in and save the model.
Tips and Tricks
- Use high-quality images to ensure accurate results
- Take your time tracing the floor plan to ensure accuracy
- Use the 3D Warehouse to add furniture and fixtures to your floor plan
- Experiment with different textures to make your floor plan more realistic
Conclusion
Creating floor plans from images in SketchUp is a powerful tool that can help architects and designers plan their designs more effectively. By following the steps outlined in this article, you can create accurate and detailed floor plans that will help you visualize your design and communicate it to others.
FAQs
Is SketchUp free to use?
SketchUp offers a free version, as well as a paid version with more features.
Can I import images into SketchUp?
Yes, you can import images into SketchUp to use as a reference for your floor plan.
Can I add furniture and fixtures to my floor plan in SketchUp?
Yes, you can use the 3D Warehouse to add furniture and fixtures to your floor plan.
What formats can I export my floor plan in?
SketchUp allows you to export your floor plan in a variety of formats, including 2D images and 3D models.
Is SketchUp difficult to learn?
SketchUp has a relatively short learning curve and offers many online resources to help users get started.


