The post Top 10 SketchUp Featured Extensions appeared first on SketchUpFamily.
]]>What Are SketchUp Featured Extensions?
Featured Extensions are a hand-picked selection of top-performing, fully-vetted plugins available on SketchUp’s Extension Warehouse. These extensions are not just functional – they meet high standards for performance, usability, compatibility, and ongoing developer support. They’re essential tools used by professionals who demand more from SketchUp.
1. V-Ray for SketchUp – Professional Rendering Power

When it comes to photorealistic rendering, V-Ray for SketchUp is the gold standard. It integrates seamlessly within SketchUp’s interface, allowing users to produce stunningly realistic visualizations right from their 3D models.
Key Features:
- Physically-based lighting and materials
- Real-time rendering with V-Ray Vision
- Cloud rendering options
- Advanced camera settings and global illumination
Use Case: Architects and interior designers who want to present polished visuals to clients, complete with accurate light, shadow, and texture.
2. Profile Builder 3 – Parametric Modeling Simplified

Profile Builder 3 brings parametric modeling to SketchUp, enabling users to create intelligent, repeatable assemblies like railings, walls, framing, and more.
Top Features:
- Smart profiles and assemblies
- Editable components for rapid design iterations
- Live previews and instant updates
- Automatic quantity takeoffs and reporting
Use Case: Perfect for construction professionals, estimators, and anyone involved in repetitive or structural modeling tasks.
3. Fredo6’s Tools – The Swiss Army Knife of SketchUp Extensions

Fredo6 is a legendary name in the SketchUp community, and his suite of tools—available in the LibFredo6 and FredoTools collections – covers everything from organic modeling to advanced transformations.
Must-Have Tools Include:
- Curviloft: Lofting and skinning between contours
- Joint Push Pull: Advanced 3D offsetting
- RoundCorner: Beveling and filleting of geometry
- FredoScale: Non-uniform and box scaling
Use Case: Ideal for advanced users who need freeform modeling capabilities or wish to add high-level finesse to architectural and artistic models.
4. Skatter 2 – Procedural Scattering and Vegetation Placement

Skatter 2 turns SketchUp into a procedural environment generator. It enables mass placement of objects like trees, grass, rocks, and even furniture with full control over distribution and randomness.
Key Benefits:
- Non-destructive workflow
- Real-time previews
- Integration with V-Ray and Thea Render
- Supports custom object libraries
Use Case: Landscape architects and urban planners benefit greatly from Skatter’s powerful distribution tools, especially when modeling parks, cities, or forest environments.
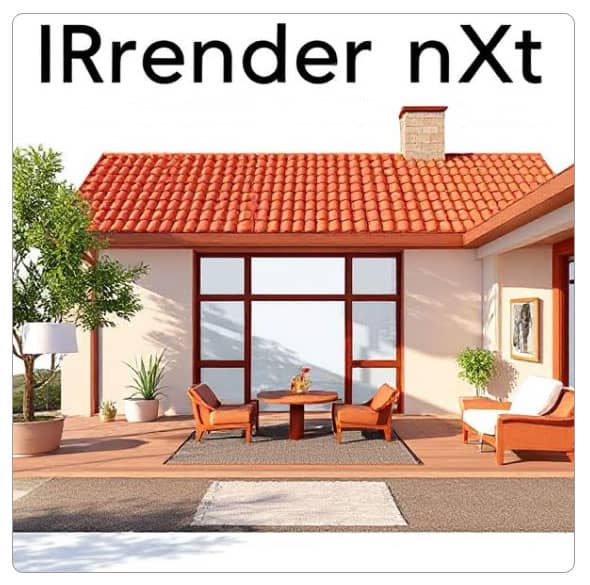
5. SU Podium – High-Quality Rendering Made Easy

SU Podium is known for its intuitive interface and powerful rendering output. It’s one of the best choices for professionals who want high-quality renderings without a steep learning curve.
Core Features:
- Raytracing and global illumination
- HDR image-based lighting
- Light fixture libraries
- 360° panorama render support
Use Case: Ideal for users who want quick rendering results without compromising on quality or having to learn complex settings.
6. CleanUp³ – Optimize and Streamline Your Models
CleanUp³ by Thomas Thomassen is essential for anyone dealing with large or messy models. It cleans and optimizes geometry, significantly reducing file size and lag.
Functions Include:
- Purging unused items
- Merging identical materials
- Removing hidden geometry
- Fixing duplicate and stray edges
Use Case: A lifesaver for professionals working on collaborative projects, or managing files passed through multiple users and platforms.
7. Solid Inspector² – Ensure 3D Printing and Boolean Accuracy
Solid Inspector² is indispensable for those preparing models for 3D printing or solid operations. It scans models for errors and guides users through the repair process.
Highlights:
- Real-time error detection
- Easy-to-follow fix instructions
- Works with nested groups and components
Use Case: Essential for engineers, product designers, and makers who rely on watertight geometry.
8. ClothWorks – Dynamic Fabric and Soft Body Simulation
ClothWorks brings soft-body physics to SketchUp, allowing users to simulate cloth draping, curtains, tarps, and more.
Notable Capabilities:
- Real-time cloth simulation
- Adjustable physics parameters
- Integration with pins, collisions, and wind
Use Case: Interior designers and 3D artists love ClothWorks for its ability to create realistic fabric elements.
9. 1001bit Tools – Architectural Drafting Efficiency

1001bit Tools is a treasure trove of architectural drafting tools built specifically to increase productivity. From staircases to walls and windows, it automates many architectural elements.
Feature Set Includes:
- Stair and roof generators
- Wall and beam tools
- Grooves and holes for construction modeling
Use Case: Especially beneficial for architects and draftsmen needing to create building details rapidly.
10. Artisan Organic Toolset – Sculpting and Terrain Modeling
The Artisan Organic Toolset is a must for any SketchUp user venturing into organic forms, terrain modeling, or character design.
Key Tools:
- Sculpting brushes
- Subdivision modeling
- Smooth and flatten features
- Mesh optimization
Use Case: Used extensively in video game design, terrain planning, and character development.
Why Featured Extensions Matter for Professionals
Utilizing SketchUp’s featured extensions isn’t just a convenience – it’s a competitive advantage. These tools allow professionals to:
- Accelerate project timelines
- Enhance visual presentation
- Improve modeling precision
- Optimize file performance
- Expand creative boundaries
Whether you’re rendering a skyscraper, populating a forest, or sculpting a fantasy landscape, SketchUp’s curated extensions give you the edge.
How to Access and Manage SketchUp Extensions
Accessing featured extensions is easy:
- Go to Extension Warehouse via the SketchUp menu.
- Use the search bar or browse the Featured section.
- Click Install and restart SketchUp if prompted.
- Manage all installed extensions via Extension Manager.
Pro Tip: Keep extensions updated for best compatibility and performance.
Conclusion: Power Up SketchUp Like a Pro
The true power of SketchUp lies beyond its base tools. With these featured extensions, users unlock unmatched creative freedom and productivity. Whether you’re aiming for hyper-realistic renders, fast prototyping, architectural accuracy, or organic artistry, there’s a plugin that can transform your workflow.
Don’t settle for average – supercharge your SketchUp experience today with these essential featured extensions.
The post Top 10 SketchUp Featured Extensions appeared first on SketchUpFamily.
]]>