

The first thing I want to talk about is the background settings.
This area is where sky, ground, and background settings are located. You can use these to set the colour of your background, as well as your sky plane and your ground plane. SketchUp creates a background for your model in several ways.
The first is that it divides your background up into ground and sky. This allows for the kind of horizon effect you get in most styles. You can adjust the colour of both the ground and the sky. In addition, you can also set the background colour, so if you don’t want the horizon effect, you can just turn the ground and sky off and simply set the colour of your background. You can also set how opaque your ground plane is, so you can make a solid ground plane by turning transparency to zero.
Finally, you can also check the showground from below. If you check this box, you’ll be able to see the ground plane even when you rotate under it. If you uncheck this box, you won’t be able to see the ground if you rotate your camera under the ground plane.
So these are good options if you’re looking to create a quick background.
But what if you want a more Photo-real background?
You can create this by using the next section watermark.
A watermark is basically an image you overlay over or under your model in order to create a certain effect. Several of the built-in styles in SketchUp already use a watermark.
Let’s talk about overlays first.
For example – the scribble on Masonite style in SketchUp uses a Masonite overlay to create a rough look to your image. As another example, in the model which I made for Halloween, I used fog to create a bit of a creepy feel. However, if I take this pencil overlay image and add it as a watermark, then change my face styles, I can also get a cool hand-drawn pencil look.
You can adjust transparencies by adjusting the blend setting (which you can always change later in the settings). Finally, you can also set how SketchUp places the image by adjusting the stretching, positioning, and aspect ratio.
Now that we’ve talked a bit about overlays,
Let’s talk about backgrounds.
You can use a watermark background in order to use a photo as a non-moving background in your models. I’ll give you two examples of how you can use this. Also, I want to note that this isn’t always the best way to add a background to your model, but it is one way. Let’s start with a house model I downloaded from the 3D warehouse. It works fine, but it’s missing a little something. What we’re going to do is use a watermark to add a sky background.
Just go in here, click add watermark, and select your sky image. There are plenty of sky images on the internet if you just google them. Double click on your sky image, then set your transparency to zero. Finally, you can uncheck the “lock aspect ratio” option (as long as it doesn’t distort your model) to stretch this image across the back of your model.
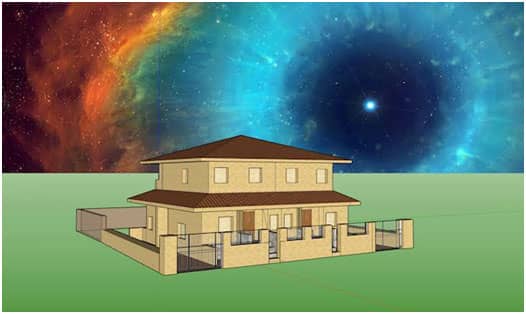
This will place your sky in the background. You may have a room model from the 3D warehouse, and I’d like to have a good view out the window. What I can do is set up a view inside the room looking out the window. We’ll do the same thing, adding an image with full opacity to create our background outside the windows. Remember to click the update button to save your changes to a style in the style manager.