This article is about Outliner and here we will be teaching about how to keep the model organised. Model organization doesn’t sound like most interesting thing in the world but by following this article and using Outliner , we will make huge difference in the way we work in Sketchup.
Outliner is best Sketchup secret. There is a little menu in the right hand side where we can find Outliner. If we don’t see it in the right hand side then we can click on Window . Under Window , click on the option default tray. Make sure to click the box of Outliner. That will show up the Outliner in the default tray on our right hand side.
1) Group and Components
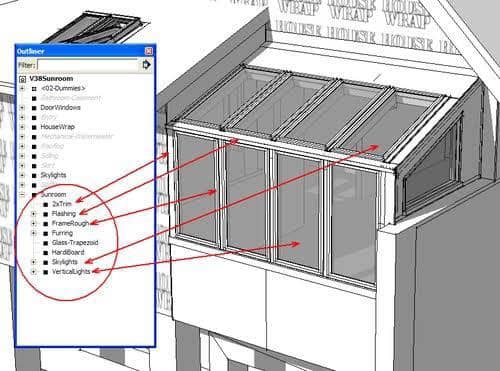
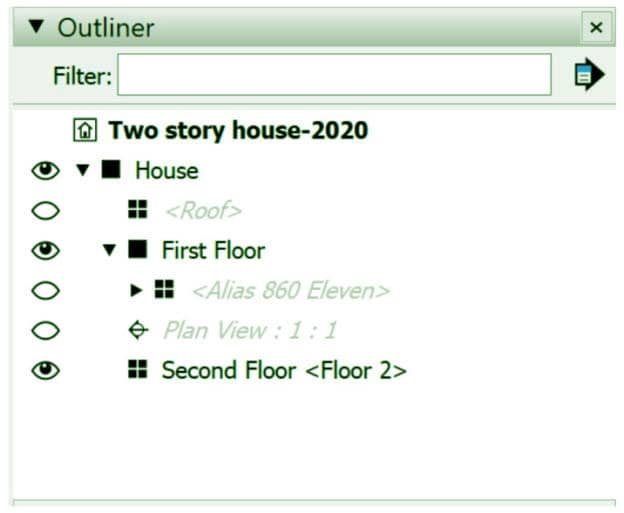
Basically it is, anytime we have a model of group and components , they show up inside the Outliner. The default model in Sketchup , which is a component , “me and bonny one” shows up in the Outliner. For example, we create a box and we right click it and make it a group. You will notice as soon as we make it a group, it will show up inside the Outliner. And once it shows up in the Outliner, we can start making changes to it , adjusting it and making it to organize any model.
2) Nested objects
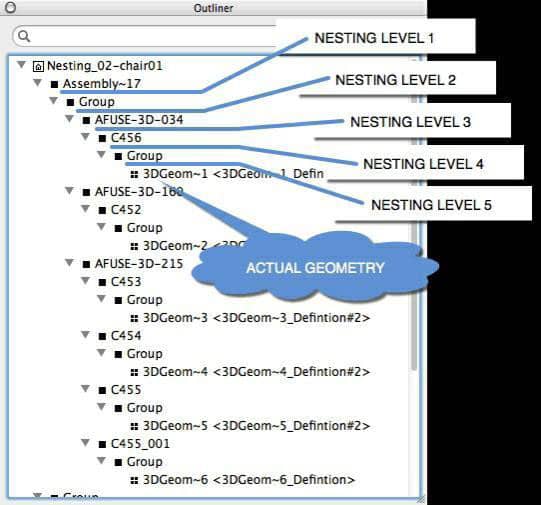
Outliner also shows nested objects. For example, we create two boxes of same size. Right click and we made it in a group. Once we have created this in group, there show up in separate under the Outliner. Now we can minimize and maximize them under outline or we can do any adjustments within the Outliner. This is a real great way to organize and also a quick way to axes things within your model. We can also rename the groups nested inside outline by just double clicking it.
3) Identifying the status of an object
Outliner uses the icons and text to identify any object as well as shows its status (open, locked, or hidden). Below this, a table shows how the icon and text change as the object’s status changes.

4) Restructuring a model’s hierarchy
If the model hierarchy needs to be changed then we can click and drag any item to a new position under Outliner. For example, if we want the sofa to be inside the 1st floor group, so that the hierarchy shows up where the sofa is located. This can be done by just dragging the sofa component to a desired location.