

SketchUp is a helpful 3D modeling software that allows us to create 3D shapes and objects. Using simple tools we can create customized objects with a high level of detail. There are two versions of SketchUp available. One is SketchUp Make which is free, and the other is SketchUp Pro. This section is all about free floor plan software so we’re going to take a look at SketchUp Make. We know for a fact though that SketchUp Pro is used by many professional architects.
SketchUp is a great tool for creating a floor plan, especially if we are just looking to calculate the area of the floor. But before we open up SketchUp we are going to measure the room. Take as many measurements as possible. It’s better to have more information than not enough.
Using SketchUp to Create a Floor Plan
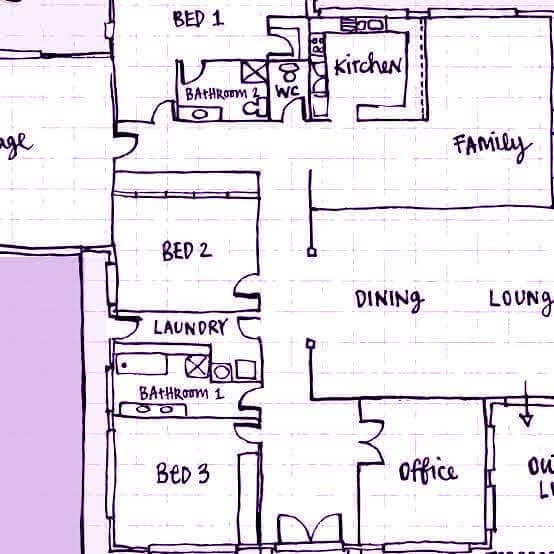
Step 1 – Measuring the Room
Here we have to just grab a piece of paper, a tape measure, and maybe a helper to hold the other end of the tape. On the piece of paper, draw a rough outline of the room. It doesn’t have to be perfect, just we have to try to draw each of the corners of the walls as we see them. We will probably notice that the proportions are just not right, but that’s OK, SketchUp will take care of it.
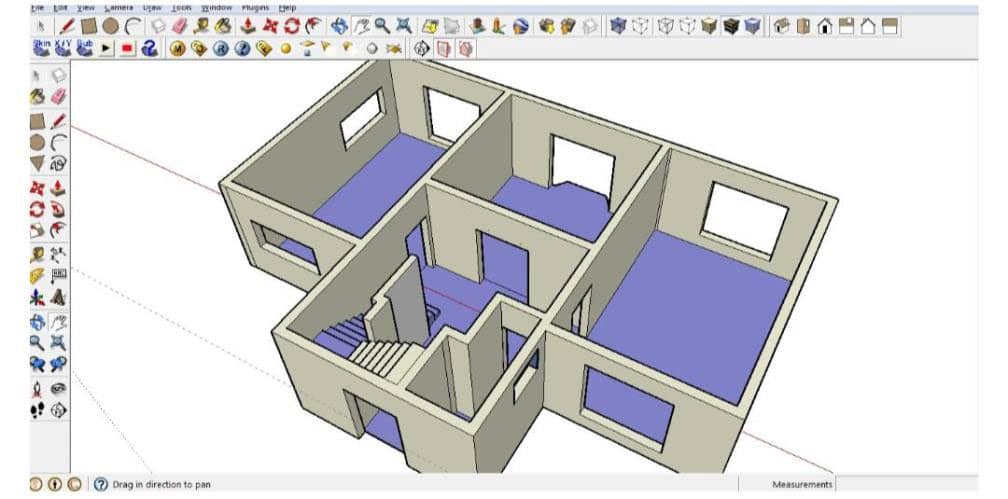
Step 2 – Recreate the Floor Plan in SketchUp
open Sketchup and make a big rectangle group to create a “floor”. This makes it easier to orbit when we have something solid to reference from. It also makes it easier for the inference system to know what we are trying to draw. In this case, a rectangle about 50′ x 40′ will be plenty big enough for what we need. We would like to create it a little bigger than the model. So after creating a big rectangle group to give a surface to reference, we start drawing an outline of the walls. This will strictly be a 2D flat drawing. To start your floor plan, we would do this:
- Start the line tool action by clicking once.
- Drag the mouse toward the general direction you want to go.
- Type in the length of the wall like this 18′ 5″ and press ENTER.
Once we have created our first line, SketchUp will be ready to draw another line from the endpoint of our first one. So creating additional lines would be like this:
- (After pressing ENTER from the previous line) Move the mouse and snap to a new axis
- Type in the length of the wall 9′ 11″ and press ENTER
- REPEAT
When we get back to your starting point, things might not line up just perfectly. We will probably find that we are off by a few inches or so depending on how precise our measurements were, and how squarely our house was built.
Once our floor plan is complete, delete the “floor group” we created at the beginning of this article. We will end up with just our floor plan outline.
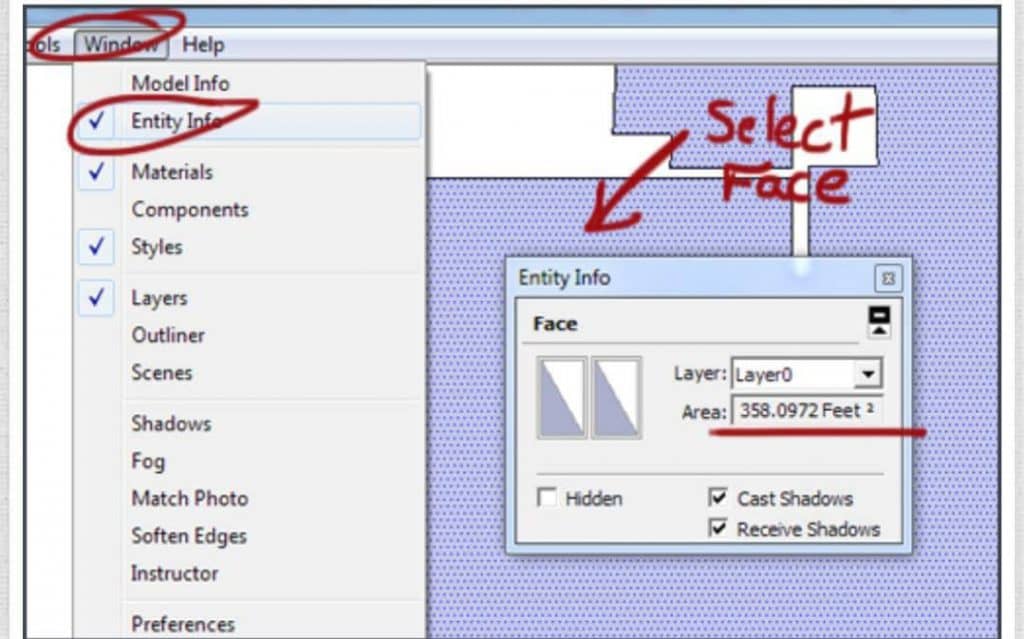
Step 3 – Calculate Area
We will just go to Window –> and select “Entity Info”. Then, with the select tool, highlight/select the face and we will see the area of the face pop up in the Entity Info window.
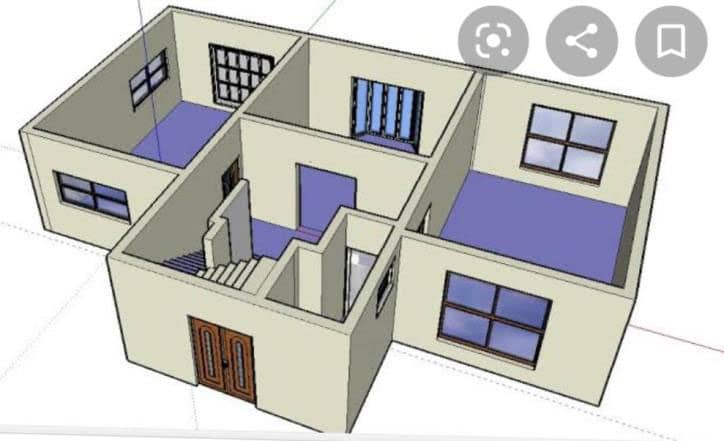
With the help of these tools, I managed to make my floor plan accurately.
Top tip – cloning
An interesting shortcut is the clone tool. To make copies of anything we just need to hold down ctrl and then drag.
We can even clone a whole floor plan. All we have to do is select the entire floor and press ctrl and a tiny plus sign will come up indicating that whatever is selected is going to be copied.
With the Ctrl key being pressed down click and drag the floor we want to clone and then simply drop that floor on top of the ground floor.