

This article on SketchUp will make you teach to use SketchUp’s face settings to create a custom style to change the way your model looks. Here we are going to talk a bit about the face options in SketchUp.
Face Option
There are a few different options that you can adjust regarding how faces look. The face options are located under the edit tab under the second box up the styles section.
The first two options allow you to adjust the way that the front and back sides of faces look in SketchUp.
For example, if you really want to make sure that only the front faces of objects are facing out, you can come in and adjust all the back faces to a red colour. That way, if red is visible, you will know that the backside of a face is facing outward.
Face Style
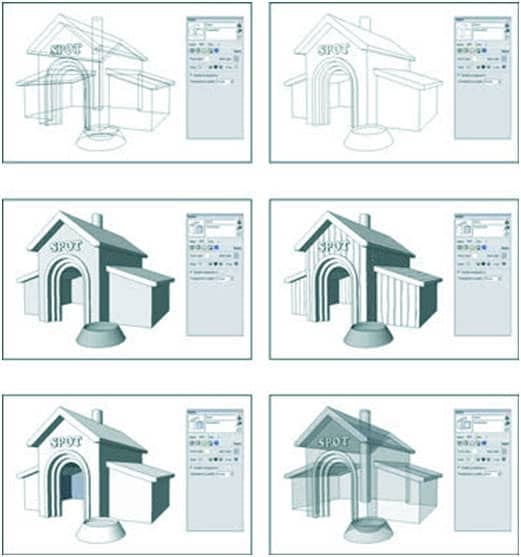
The next section in this area we are going to talk about is the face styles. There are 5 different options for your face styles.
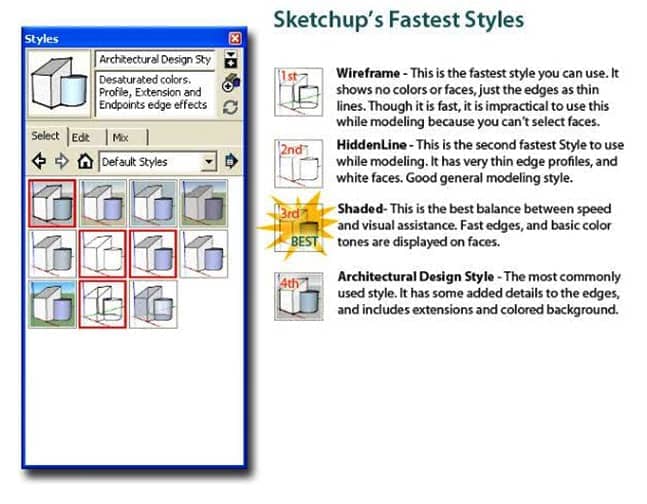
- Wireframe mode
Wireframe mode shows only the lines making up your model – this means no faces are actually shown.
- Hidden Line Mode
Hidden line mode appears all the lines that are clear in a current camera angle while hiding any lines that are behind faces. No colours or materials are visible on faces.
- Shaded Mode
The shaded mode will show the colours of materials on all of your faces, but no actual texture images are going to be shown. This means any faces with texture images, such as roof tile or brick will be rendered with a single, uniform colour. This can make the model accelerate if it has a bunch of high-resolution texture images in it. Shaded using textures shows all textures exactly as they are, colours, texture images and all.
- Display Shaded
Display shaded using all same will render all faces in the model as your default front / back face colours.
- X-Ray Mode
X-ray mode will allow you to point to outlines that are hidden behind faces.
Transparency
You can adjust your model to show transparency or not, as well as the quality of the transparency. Turning transparency off can make your model run faster. If you set your transparency quality to pleasant, you can dictate how transparent objects are.
EXAMPLE
How to use these style options when you combine them?
The model is pulled out of the 3D warehouse of the empire state building. You can build up a bunch of rectangles to act as windows.
We have to now start by setting our model to shaded mode. Next, let’s enter our line settings and make a few changes. Let’s turn jitter on, also as depth cues, and add some extensions to our points. You will notice how this lets you create a whole new look for your model. You can now export this image to be used elsewhere.