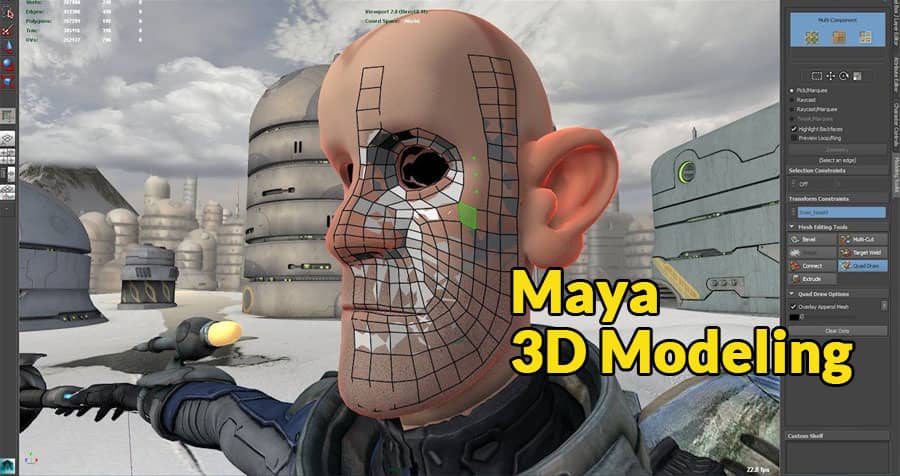
Autodesk Maya is one of the most powerful and versatile software tools available for 3D modeling, animation, and rendering. Used extensively in the film, television, and video game industries, Maya offers a robust set of tools and features that allow artists to create highly detailed and complex models. For beginners, Maya may seem daunting due to its comprehensive interface and vast array of functions. However, with a structured approach, newcomers can learn to navigate Maya and start creating their own 3D models.
Getting Started with Maya
Installation and Interface Overview
- Installation:
- Download Autodesk Maya from the official website. You can opt for a free trial or purchase a subscription. For students, Autodesk offers free educational licenses.
- Follow the installation instructions and launch the software.
- Interface Overview:
- Main Menu Bar: Contains essential functions for file management, editing, and rendering.
- Shelf: A customizable toolbar with shortcuts to frequently used tools and commands.
- Viewports: The main working area where you can view and manipulate your 3D models from different perspectives.
- Channel Box/Layer Editor: Displays and allows the modification of object properties and layers.
- Attribute Editor: Provides detailed control over the properties of selected objects.
- Toolbox: Contains essential transformation tools like move, rotate, and scale.
Basic Concepts in 3D Modeling
Understanding 3D Space
- Coordinate System:
- Maya uses a three-dimensional coordinate system (X, Y, Z) to define the position of objects in space. X represents the horizontal axis, Y the vertical axis, and Z the depth axis.
- Viewports:
- Maya offers multiple viewports (Top, Front, Side, Perspective) to help you view and manipulate objects from different angles. You can switch between these using the ‘Spacebar’.
Essential Tools and Operations
- Transform Tools:
- Move (W): Allows you to change the position of an object along the X, Y, and Z axes.
- Rotate (E): Enables rotation of the object around the three axes.
- Scale (R): Adjusts the size of the object.
- Selection Tools:
- Select Tool (Q): The default tool for selecting objects and components.
- Lasso and Paint Select: Tools for more precise and complex selections.
- Object Components:
- Vertices: Points in 3D space that define the corners of a polygon.
- Edges: Lines connecting two vertices.
- Faces: Flat surfaces enclosed by edges.
Creating Your First 3D Model
Starting with Basic Shapes
- Creating Primitives:
- Go to ‘Create > Polygon Primitives’ and choose a basic shape like a cube, sphere, or cylinder. This will be the starting point of your model.
- Manipulating the Shape:
- Use the transform tools to position, scale, and rotate the shape in the viewport.
- Switch between component modes (vertex, edge, face) to make more detailed adjustments.
Building and Refining Your Model
- Extrude Tool:
- Select a face and use the ‘Extrude’ tool to extend it, adding more geometry to your model. This is a fundamental technique for creating complex shapes from simple ones.
- Insert Edge Loop Tool:
- Add more edges to your model to refine its shape and add detail. You can find this tool under ‘Mesh Tools > Insert Edge Loop’.
- Merge and Bridge:
- Combine vertices and edges to create seamless transitions between different parts of your model using the ‘Merge’ and ‘Bridge’ tools.
Smooth and Subdivide
- Smoothing:
- Use the ‘Smooth’ tool (found under ‘Mesh > Smooth’) to make your model appear more organic and less angular.
- Control the level of smoothness to retain important details while creating a polished look.
- Subdivision:
- Subdivide your model to increase its resolution and allow for finer detail. This can be done by applying subdivision surfaces (‘Subdiv Proxy’).
Texturing and Rendering
- Applying Materials:
- Open the ‘Hypershade’ window to create and apply materials to your model. Materials define the surface properties, such as color, transparency, and reflectivity.
- UV Mapping:
- UV mapping is the process of projecting a 2D image texture onto a 3D model. Use the ‘UV Editor’ to unwrap and align your model’s UVs for accurate texturing.
- Rendering:
- Set up lighting and cameras in your scene to prepare for rendering. Use the ‘Arnold RenderView’ or ‘Maya Software Renderer’ to generate high-quality images of your model.
Practice and Resources
- Practice Projects:
- Start with simple projects like modeling household objects or basic characters to build your skills gradually.
- Online Tutorials and Courses:
- Utilize resources like Autodesk’s official tutorials, YouTube channels, and online courses from platforms like Udemy or Coursera to learn advanced techniques and workflows.
- Community and Forums:
- Join forums like CGSociety, Polycount, and Autodesk’s own forums to seek advice, share your work, and learn from other experienced artists.
Conclusion
Maya 3D modeling can be complex, but with patience and practice, beginners can learn to create impressive models. By understanding the basics of the interface, tools, and techniques, you can start building and refining your models with confidence. Keep exploring, practicing, and expanding your skills to fully unlock Maya’s potential and create stunning 3D artwork.


