You need to first draw a face and then type in the dimensions: 1′, 2″. Then, select the face.
Open the Profile Builder Dialog, and then create your own profile. In your profile, mention your name, and set the Placement Point to ‘Bottom-Middle‘. Thus, your profile is built.
Using the push & pull tool, select the face and type 6′ again. Now draw a face and type in 2″, 1’.
Using this tutorial, you can now check the members of a profile and their components.
You can make a component with a right-click and then change the axes with a right-click again.
The axes can be placed in the center. When we build later, the component will be positioned properly.
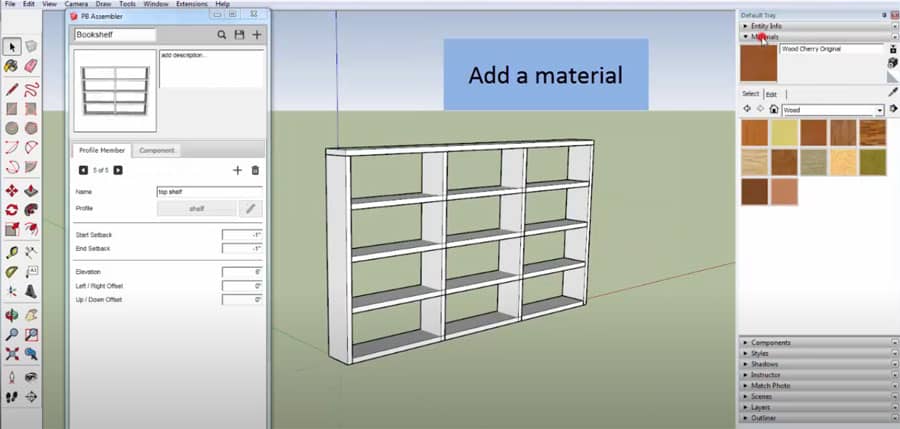
A new assembly is created after you open the Assembler Dialog Box. You can name and describe the assembly.
After giving your model a name, you click the “Pick from Model” button. You can then pick a Profile Member from within the model.
The number of profile members can be increased up to five. You have to change elevation: 1.5’, 3’, 4.5’, and 6.
Once the component tab is selected, you can start adding components. Creating an assembly can be done by clicking “Build Assembly”.
Members of Profile overlap with members of the component at the moment. Setting backs can be edited by Profile Members. If the bottom shelf is setback 1″ from the wall, do the same for the inner shelf.
To update changes, click ‘Apply Assembly Attributes’ to apply the setback negative 1. You can choose the built assembly. The Members of the Profile no longer overlap the Members of the Component.
For more information, CLICK HERE to watch the video tutorial
You can choose a woody cherry material for the Component. Click the profile attributes button to add material to a member’s profile. Choose the material you wish to use in your model and click OK.
This process can be repeated for other Profile Members. Once you have applied assembly attributes, you can save the assembly for future reference. You have now completed the assembly creation process.


