

In this SketchUp article, we will teach you to create custom styles by adjusting edge settings to change the way your model looks.
Lines and Saving
In this article, we’re going to talk about how to create your own custom style in SketchUp.
To start off, click this tiny button with the sign thereon. This will create a new style. Name it whatever you’d like. This will be your style. Now to start out off, this may just create a replacement thumbnail within the “In model” drop-down.
First note
If you would like to save lots of your new style, right-click thereon and click on save as then pick a location and you will load this style in future versions of SketchUp.
In addition, if you save your styles during a folder, you will use the “Open or create a collection” choice to open all the styles in a given folder.
Now let’s talk about customizing our style.
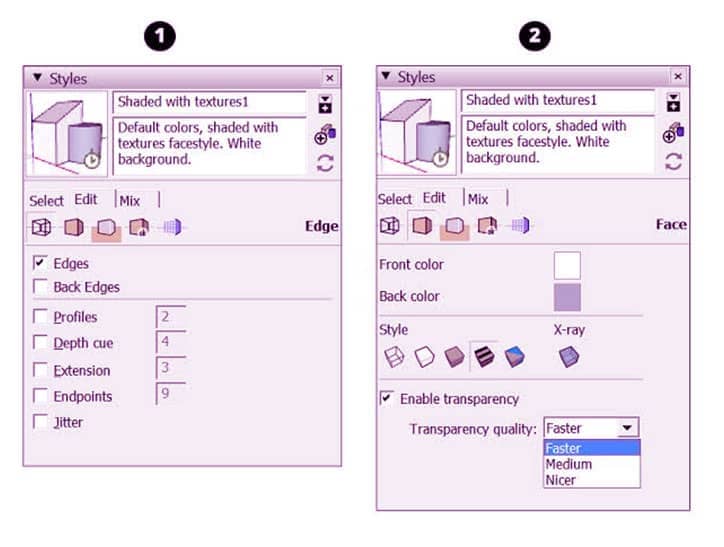
To customize your style, you are going to seem under the “edit” tab. This is where all of your different style options are located. If you check out this section, there are 5 boxes right at rock bottom of the edit tab – this is often where you are going to vary the design options in your model.
The one that appears sort of a wireframe box is where you edit your edges. In this box, you will change everything from showing edges in the least, to changing the thickness of your lines, to adding extensions and endpoints to your lines. Jitter will render your lines at a small offset, giving your model a small hand-sketched look.
Remember that once you start getting plenty of various lines in your model, having most of those turned on will slow your model down.
The sink at rock bottom allows you to regulate how lines are colored. Turn on “by axis to ascertain which lines in your model are drawn along axes.” If the lines aren’t colored, they are not drawn straight on an axis.