

In this article, we’ll mention using scenes in SketchUp, first to save lots of and work with views, then to make flythrough animations. We are going to use section planes to make moving cut-through animations in our model. To start off, we are going to have to start by learning how to create a section cut.
Navigating Section Cut
In order to built on a section cut, go up to tools, section plane. When you select this, you’ll see that you simply get a box with four arrows on the corners that move along side your house. You can see that it’ll attempt to inference to different faces as you mouse over them. You can also lock the plane to an axis using the arrow keys. Once you’ve got the plane where you want it to be, click once to line your plane.
Important – you would like to travel to look at and switch section planes to on so you’ll see them.
Processing
You are also going to want to make sure that “Section planes” are checked in your view section. When you turn this on, you’ll see that there’s this box with arrows coming off of it. Then, if you do not want to ascertain the plane, you’ll return to section planes and switch planes to off to only see the geometry in your model. The next thing you’re getting to note is that you simply can use the move tool to move this plane around. You can use this to regulate the sections in your model.
Reverse
If you right click on your section plane, there are several different options you’ll select. The first is reverse. If you click reverse, SketchUp will flip the section cut within the other way.
Active Cut
The next is active cut. Active cut is vital because if you uncheck it, your section cut are going to be deactivated. This becomes vital once we work with scenes, because SketchUp animates the transition between the cuts.
For example – if you add a second cut to this model, then create two scenes – one with the first cut active, the second with the second cut active when you transition between scenes, SketchUp will animate the transition, creating a moving animation in my model.
Align View
Next, there’s align view. Align view is great for creating section views with section planes. It will basically move your camera in order that you’ve got a straight on view to the geometry you’re sectioning. This works great in conjunction with turning perspective off within the view section.
A new option that SketchUp had added – create group from slice. Basically what this suggests is SketchUp will cut your model along your section location, separating the various geometry at the purpose of your section.
Example – Concrete Section Cuts.
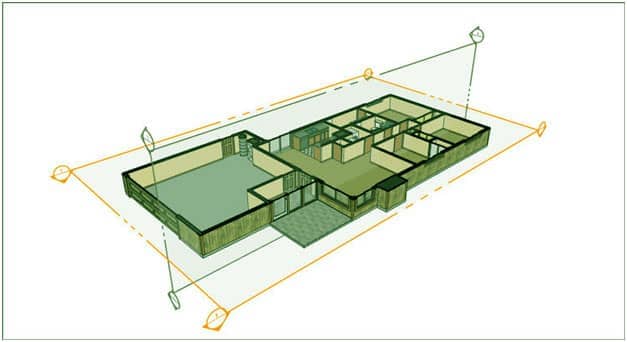
Let’s say we’ve a house model and that we want to make a section cut showing us what the within of the house would appear as if.
What we’ll do is take this house, then go up and add a section plane. We can then move this section plane around until we get the view that we might like.
Once we get the view we like, you’ll right click on this view, select “Align View,” and switch perspective off. This gives you an ideal section cut of your house. The next thing you’ll do is create a second section cut supplying you with a special view, make it the active cut, and add a replacement view. You can then rename your views in your scene manager, allowing you label your view tabs so you can move quickly between them.
Remember – that your scene stores regardless of the active cut is in your model, so if you ever got to update a view, just confirm you’ve got the proper cut selected, then update your view.